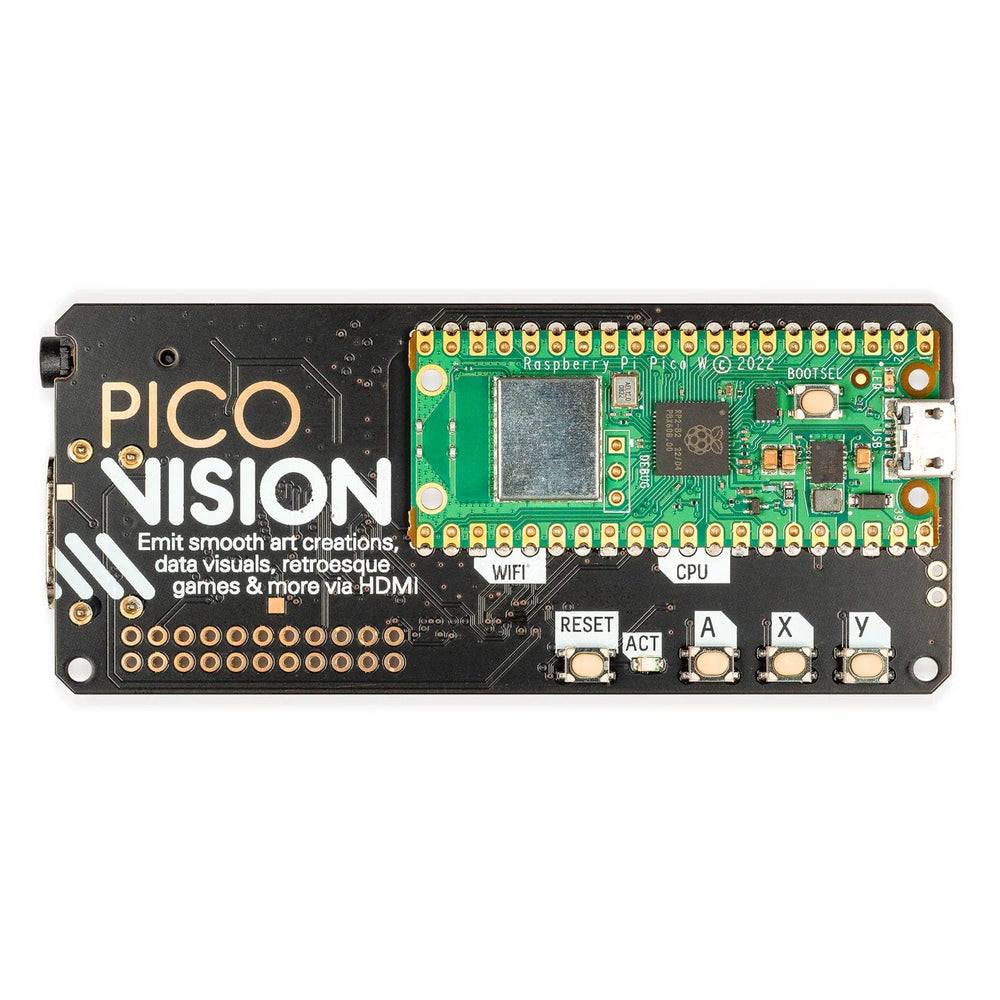
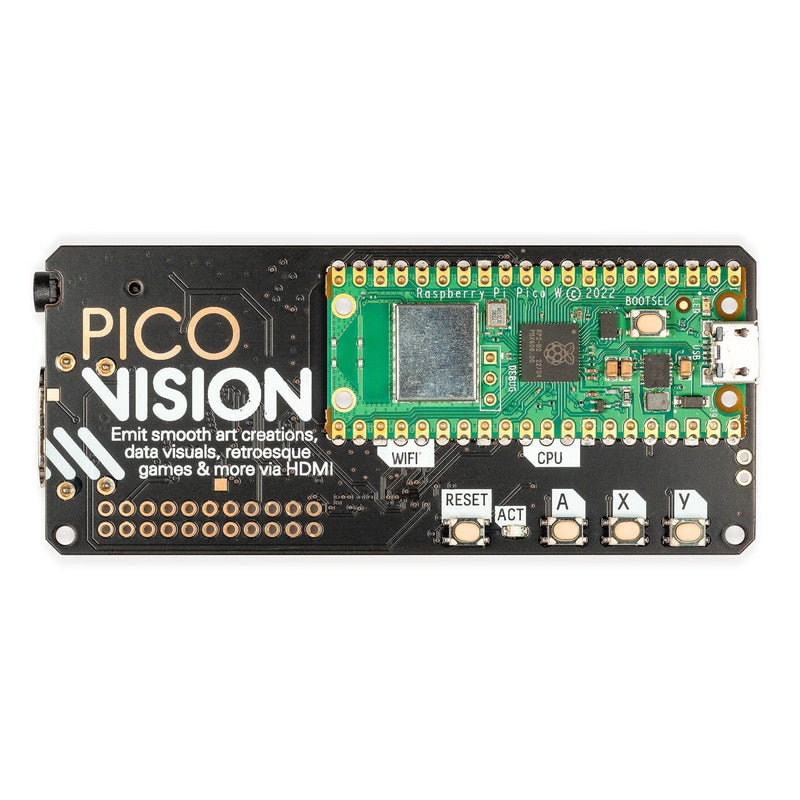
PicoVision (Pico W Aboard) – PicoVision Only

PimoroniSKU: PIM674
Price:
Sale price £34.50
incl. VAT
excl. VAT
Stock:
Only 10 units left
Quantity:

Awesome Extras

SanDiskSanDisk MicroSD Card (Class 10 A1)
Sale priceFrom £6 incl. VAT excl. VAT
The Pi HutUSB-A to Micro-USB Cable
Sale priceFrom £1.50 incl. VAT excl. VAT

Use PicoVision to make and run your own homebrew games, draw digital art, recreate beloved demos, screensavers or WinAmp visualisations, visualise data, subvert advertising billboards, emulate CeeFax or whip up some last-minute signage for your cyber night market.

We managed to cram a lot into this little thing.

  • GPU (RP2040)
    Does all the heavy-lifting to display buttery-smooth, high-res, animations on your TV or monitor via HDMI.
  • CPU (Pico W)
    Runs your code and provides an interface to other gadgets through USB, Wi-Fi, and Bluetooth!
  • HDMI connector
    Make use of TVs, monitors, giant projectors, or even tiny displays for building into a cosplay outfit.
  • Line out audio
    Bash out some bleeps and bloops! This digital audio interface can produce some quality noise.
  • microSD card
    Never run out of space for your lovely assets by adding a sizeable microSD card to your setup.
  • Qw/ST connector
    Add sensors or other types of breakouts to your project so they can react to the world around them.
  • On-board reset and user buttons
    Create a simple user interface for your project without needing to add any extras.

You can program PicoVision using C++ or MicroPython. C++ will get you the best performance, but if you're a beginner we'd recommend MicroPython for ease of getting started.

Either way, you'll have access to our in-house PicoGraphics libraries which will let you easily manipulate shapes, text and images, some exciting new vector graphics and font functionality courtesy of PicoVector, and the ability to make bleeps, bloops and other fun electronic noise with PicoSynth.

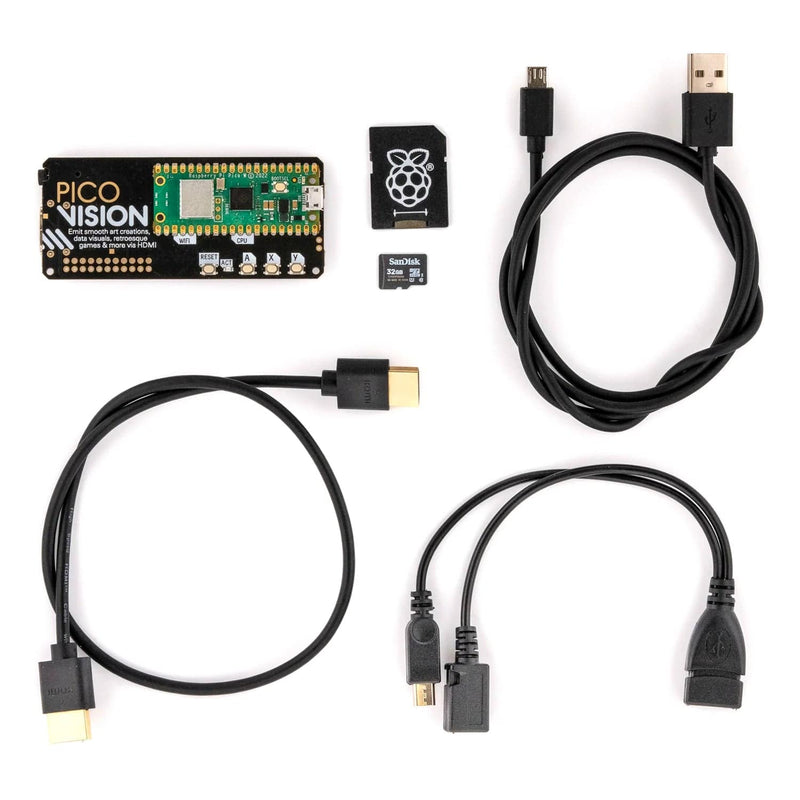
If you are looking for all the cables to get you started, click here to buy the PicoVision with an accessory kit.

Features

  • Raspberry Pi Pico W Aboard (CPU)
    • Dual Arm Cortex M0+ with 264kB of SRAM
    • 2MB of QSPI flash supporting XiP
    • 2.4GHz wireless / Bluetooth 5.2
  • RP2040 (GPU)
    • Another dual Arm Cortex M0+ with 264kB of SRAM
    • Higher resolution modes use significant GPU overclocking*
    • Connects to the CPU as an I2C peripheral device
  • 2 x 8MB PSRAM chips for frame double-buffering
  • Digital Video out via HDMI connector
  • PCM5100A DAC for line-level audio over I2S wired to a 3.5mm stereo jack
  • MicroSD card slot
  • Three user buttons (one wired to CPU, two to GPU)
  • Reset button **
  • Status LED (GPU)
  • Qw/ST (Qwiic/STEMMA QT) connector
  • Fully-assembled (no soldering required)
  • Spare/extra pins broken out as unpopulated headers (these require soldering) ***
  • C++/MicroPython libraries

How it Works

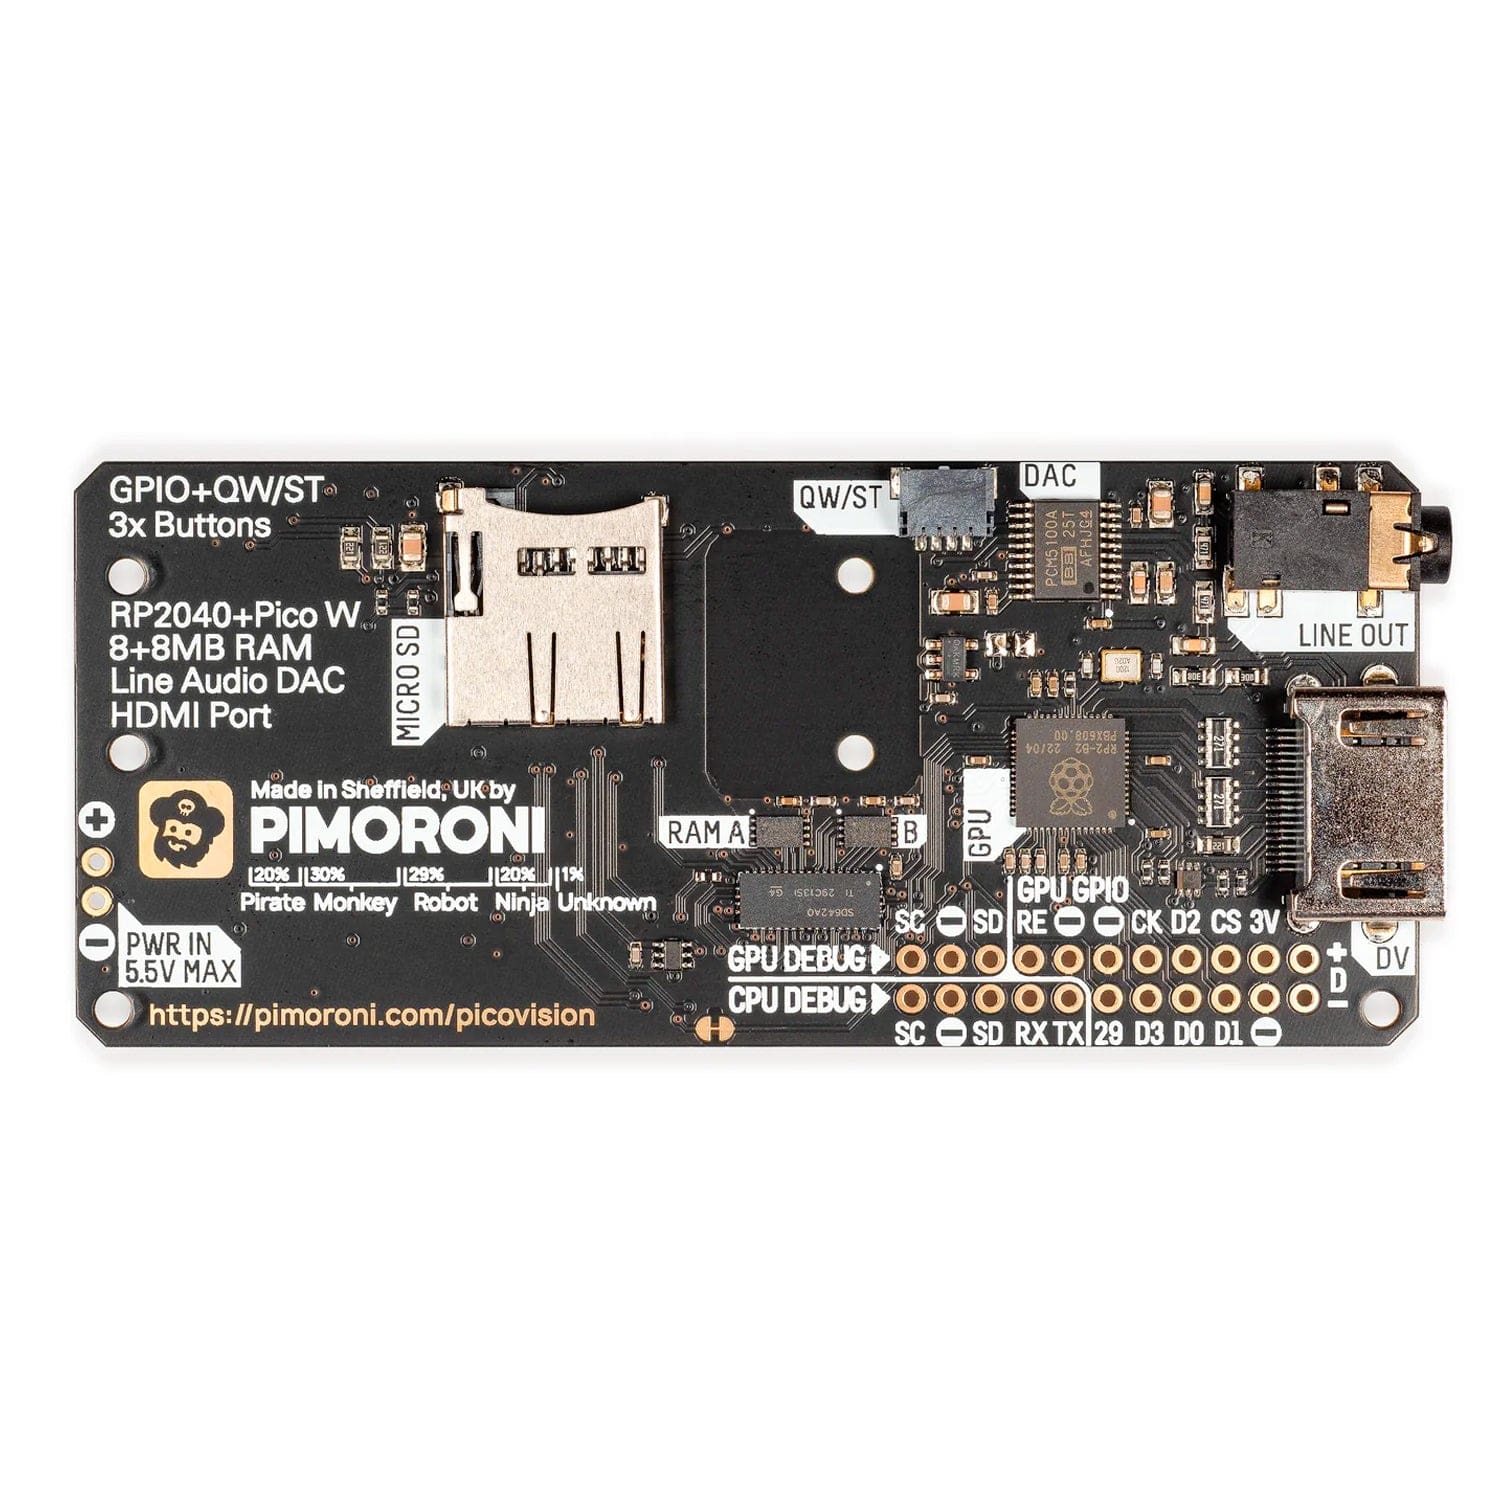
PicoVision uses two RP2040s - one on a Pico W as a "CPU" and one as a "GPU" - to produce high-resolution (for a microcontroller) DV output by swapping the contents of two physical PSRAM frame buffers back and forth between them.

The two PSRAMs act as a front and back buffer. The "CPU" (the Pico W) writes to one while the "GPU" (RP2040) reads from the other, applies some "hardware" effects and generates the DV signals.

You can find out more about the hardware here.

The ingenious firmware for PicoVision's GPU has been developed with the considerable help of long-time collaborator and software wizard Mike Bell.

Resources

Pinout and Dimensions

Notes

  • Click here for a list of supported display resolutions and some caveats. Note that some higher resolution modes require significant overclocking of the CPU, so are not guaranteed to work on all PicoVisions.
  • ** By default, the reset button resets both the CPU and GPU. If, for some hackerly reason you want to make it just reset the CPU, there's a cuttable trace on the back of the board.
  • *** We've broken out some spare pins as unpopulated headers along the bottom of the board. You can find the serial wire debug pins for both the GPU and CPU here, plus several unused/extra GPIO (hey, why not use the spare pins on the GPU as an I/O Expander!). As they're unpopulated, soldering is required to use these.
  • Our software doesn't support audio output over HDMI, but if you're brave and want to attempt passing I2S audio data from the CPU (or the PSRAM buffers!) to the DV connector, the board is wired to support this.
  • Note that PicoVision doesn't output SCART/composite signals, so if you want to use it to play Doom on an old CRT TV or monitor you will need an additional HDMI to composite converter/adaptor.

Payment & Accreditations

Payment methods
Visa Mastercard Maestro PayPal Amazon Klarna

Your payment information is processed securely. We do not store credit card details nor have access to your credit card information.

Accreditations